A few basics before you jump into using graphics:
- All pictures live in boxes.
- All boxes have borders and backgrounds.
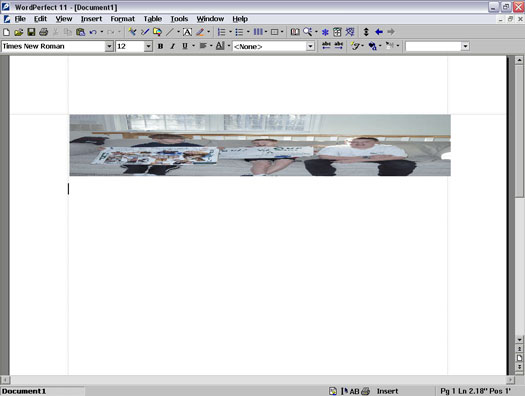
- You can select boxes and the pictures that are in them in two ways. If you're typing along in your text and you click a box, you get black handles and no border around your box (unless your box itself has one). This means that the box itself is selected. Pull on one of the handles and the box changes size and shape. The contents are stretched like Silly Putty to fit the new shape of the box. See Figure 1 to see a stretched picture. Figure 2 shows the black handles. (If you stretch an image by accident, click some text in your document. Then you can use Edit --> Undo to restore the picture to its previous state.)
>

Figure 1: S-t-r-e-t-c-h-i-n-g a picture.
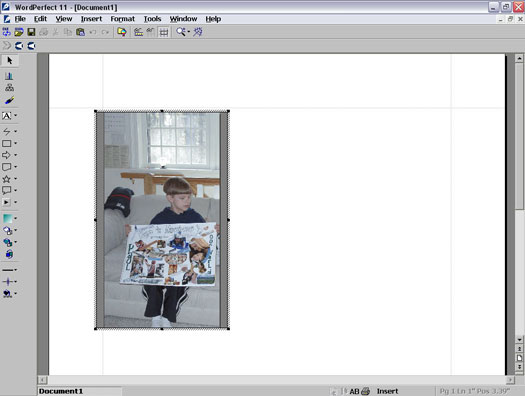
- If you're typing along in your text and you double-click a box, you get the same black handles, but you also get a dotted-line border (whether or not your box itself has a border). Drag the handles to change the size of the box without affecting the contents of your box. Figure 2 shows the dotted-line border and what appears when you drag one of the handles.
>

Figure 2: By dragging the right handle, the image is cropped.
Inserting some of Corel's Clipart into your document
Here's the simplest way to insert a graphic into your document. To use one of the Clipart images that Corel includes with WordPerfect, proceed as follows:
1. Choose Insert --> Graphics --> Clipart from the Menu bar.
Or click the Clipart button on the Toolbar.
2. Scroll down through the Scrapbook until you see an image you like.
3. Select the image and click the Insert button.
Alternatively, you can drag the image from the Scrapbook window into your document. To do so, the easiest thing to do is to move the Scrapbook off to the side of the document by clicking and dragging the Scrapbook window's title bar (that bar, the one that says Scrapbook, appears just above all the images) until you can see the place where you want your image inserted.
4. Get rid of the Scrapbook by clicking the Close or Minimize button.
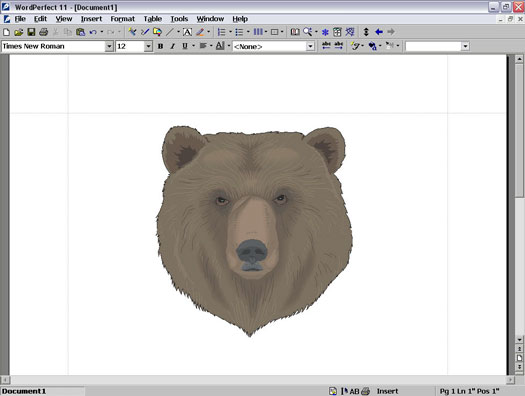
Your cursor now merrily blinks at just the point where you left it, and your graphic should appear in your document. Overall, not too difficult. Figure 3 illustrates the copy of the bear face.
>

Figure 3: Smokey or Yogi?
This graphic is in a box. To move the graphic, click the edge of the box and drag it around. To change its size, select it and then click the corners and drag them around. To add a border to the graphic, select it and then click the Border Style button in the Property Bar.
If dragging and dropping images from the Scrapbook into your document doesn't work for you, click the image you want in the Scrapbook and then click the Insert button. This method also has the added advantage of removing the Scrapbook from your screen for you when you click the Insert button.
Keep in mind that the proportions that you see on-screen may not completely match the ones that you'll see when you print. Print a test of your document to check it before you print 100 copies for the next company meeting.
You can also size the image to exact dimensions by right-clicking the image and then choosing the Size command from the Image QuickMenu that pops up.
Selecting Clipart from the Internet
If you don't see a picture you like under the Clipart tab in the Scrapbook dialog box, click the Internet button in that same dialog box. You'll be connected to the WordPerfect Office Web site where you can choose from a boatload of additional photos, clipart, and more.
Of course, to connect to the Internet, you need either a network connection (if you're at work), or a connection through a service provider if you're at home.
This Web page has some handy instructions that tell you how to proceed. Basically, you save the scrapbook file that's on the Internet to a folder on your local hard drive. Then, when you're back in WordPerfect, you click the Import Clips button in the Scrapbook dialog box and select that file in the Insert File dialog box.
Inserting a picture from somewhere else into your document
Whew! Well, if the Clipart that comes with WordPerfect and the graphics available on the WordPerfect Office Web site don't work for you, you can always borrow a picture from a friend or co-worker or download one from a different Web site. WordPerfect is happy to insert just about any ol' image file into your document. Here's how:
1. Make sure that the graphics file is on a disk in your PC (or on your network).
You'll need to remember where you saved the file, such as your My Pictures folder; otherwise, you'll have to search for the file on your disk.
2. Choose Insert --> Graphics --> From File from the Menu bar.
The Insert Image dialog box appears.
3. Double-click the filename, or click the filename and click Insert to insert the picture into your document.
You may have to dig down through some folders to get to the graphics files.
If you need a get a preview of the picture, click the View button on the toolbar and then choose the Thumbnails option. (The Insert Image dialog box has a Preview feature, but, bizarrely, it doesn't support most graphic types, so use the Thumbnails preview instead.)
The same rules apply for inserted graphics files you insert as for Clipart: It's a box, it can have borders, and you can move it and resize it just like any other box. To resize a box, double-click the image until you get the dotted-line border (refer to Figure 2); otherwise, WordPerfect will be happy to stretch your picture for you when you drag the handles, and that usually looks really funny (not funny in a good way).
>
dummies
Source:http://www.dummies.com/how-to/content/working-with-graphics-in-wordperfect-11.html
No comments:
Post a Comment