Three considerations exist when you configure access permissions for any given resource on a Windows XP PC. Remember them easily by the keywords which, who, and what.
Which resources users can access
The first step in configuring access permissions is to specify which resources users can access. Resources typically means files, folders, printers, Registry keys, and Web servers (which you can create in Windows XP Professional through the optional IIS component).
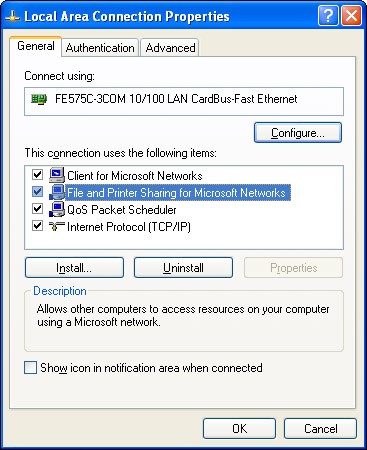
- To share a resource across a network link, you typically right-click the resource and click a command like "Sharing." The main requirement is that you have the File and Printer Sharing for Microsoft Networks service (which appears as simply "Server" in the Services administrative tool) installed for the network connection. Open the Network Connections folder from the Control Panel menu, right-click the icon for your network adapter, and see whether this service appears in the list and is checked as active (see Figure 1). If it doesn't appear, install it by clicking the Install button.
>

>
Figure 1: This network connection has the sharing service installed and activated.
- You can control access at the folder level only when using the shared folders method on a non-NTFS disk. If you want to share a file, put it into a shared folder. If you want to control access to a file, set access privileges for the folder in which it resides.
- In the absence of a policy setting to the contrary, you can share folders on removable disc devices, such as CD-ROM drives, as well as hard drives.
- In the case of local resources, the default behavior is for all files, folders, and printers to be accessible to all users. In the case of network resources, the default behavior is just the opposite, and you must explicitly share resources.
Who can have access
Step 2 in configuring access permissions is to specify who you want to have access to the resource. You may want to share a folder and make it available to certain departments but not others.
- If you're using shared folder permissions and/or NTFS permissions, you can grant access based on user names and group memberships.
- Generally, using groups is preferable, because it takes less time and effort to administer group-based security.
- Certain special groups make granting access permission more convenient.
What users can do with the resource
You can control which resources become shared, and who gets to use those resources. Even that may be insufficient control, however. In many cases, you want to control what those users can do with those resources. The third and (usually) final step is to specify what users can do with the resources that you share.
- The specific actions vary depending upon the type of resource. For example, the action "query a Registry key" doesn't really mean anything when you're talking about accessing a printer.
- You define which actions are allowed and which aren't by checking and unchecking boxes in an ACL editor window where ACL means Access Control List. The three types of ACL editors you see are for Registry keys, files/folders (on NTFS disks), and printers.
>
dummies
Source:http://www.dummies.com/how-to/content/configuring-access-control-in-windows-xp-professio.html
No comments:
Post a Comment