You can convert a digital photo’s file format on your computer by using Adobe Photoshop Elements. Elements lets you choose from a list of formats, so you can make your picture file just what you want it to be. To change an image file format, follow these steps:
>
>

>
1
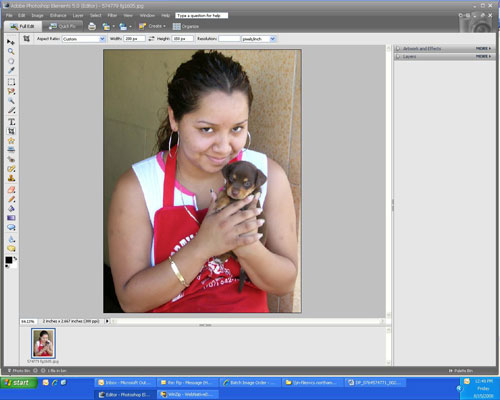
Open the image in Adobe Photoshop Elements, as this figure shows.
>
Start by bringing the photo up in Elements.
>
>
>

>
2
Choose File→Save As.
>
The Save As dialog box appears, as shown in this figure.
>
>
>
>
3
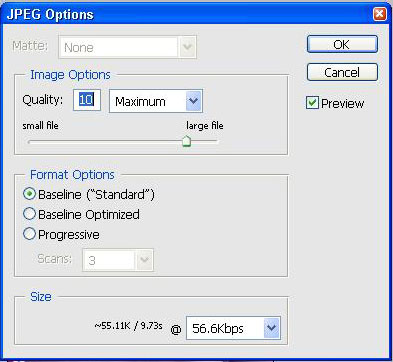
Select the file format that you want to change the image into.
>
You can save your file as TIFF (a high-quality graphic type), GIF (a compressed file type that’s common on the Internet), PNG (designed to work well with online viewing applications, similar to GIF), BMP (a Windows bitmap file that Windows graphics programs create by default), or JPEG (the most common file type created by digital cameras).
>
>
>
>
4
Click the Save button.
>
After you change a file type, Windows automatically chooses the correct file extension and adds it to the end of the filename. Photoshop asks you to verify the file’s change of format.
>
>
>
>
5
Click the OK button in the dialog box if you still want to save your image file in the new format.
>
The image is saved as the new type.
>
>
dummies
Source:http://www.dummies.com/how-to/content/change-a-photos-file-format-in-adobe-photoshop-ele.html
No comments:
Post a Comment