For those of you who are already familiar with XML in Access 2002, note that the enhanced XML support in Access 2003 enables you to specify XSL (Extensible Stylesheet Language) transform files when importing data from, or exporting data to, XML. When importing, the transform is applied to data as soon as importation starts, before a new table is created or an existing table is appended to.
When exporting data to XML, you can include any predefined filters or sort order when exporting data to XML. You can export just the data, just the schema, or both. Also, if a table contains lookup values stored in a separate database, you can include that data in the exportation.
You can easily export any table, query, form, or report to XML files from a regular Access database (.mdb file) or an Access project and Microsoft SQL Server database (.adp file). When you export a form or report, you actually export the data behind the form or report (you export the data from the form or report's underlying table or query). Regardless of which type of object you export, though, the procedure is the same.
The first step is to click the Tables, Queries, Forms, or Reports button in the Objects list in the Database window and select the item you want to export from the list that appears in the right pane of the window. If you want to export all the data that the object stores, you can just right-click the object's name and choose the Export option from the shortcut menu. Then skip the next paragraph.
If you don't want to export a complete table or query, you need to export data from a table or query. Open the table or query, and then do any of the following:
- If you want to export a single record only, select that record.
- If you want to filter records for export, apply a filter to the records now.
- If you want to specify a sort order for the records, arrange the records into that order now.
After you select the records, choose File --> Export from the Access menu.
The Export dialog box opens. Navigate to the folder in which you want to store the exported data. Choose the XML (*.xml) option from the Save As Type drop-down menu, as shown in Figure 1.
>
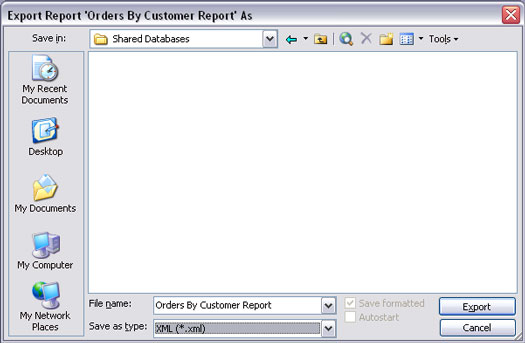
Figure 1: Setting up the Export dialog box to export a report to XML.
Click the Export (or Export All) button in the dialog box, and the Export XML dialog box opens, as shown in Figure 2. You have a choice of exporting data only to an XML file, exporting a schema of your data to an XSD (XML Schema Definition) file, exporting the presentation of your data to an XSL file, or any combination thereof.
>
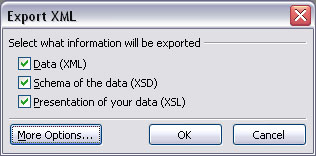
Figure 2: The Export XML dialog box.
Optionally, you can further refine your selections by clicking the More Options button. Clicking the More Options button expands the Export XML dialog box to . . . show more options! Note the three tabs across the top of the dialog box: Data (shown in Figure 3), Schema, and Presentation.
>
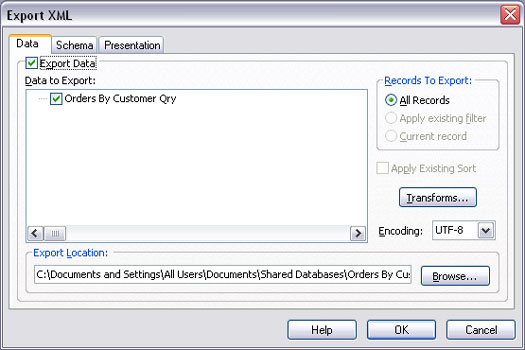
Figure 3: The Data tab on the expanded Export XML dialog box.
Choosing XML data options
On the Data tab, you can choose to export all records, filtered records, or the current record. Also, you can opt to apply the sort order that's currently applied to the object. (However, those options are dimmed if you export something to which those options don't apply, such as an entire report.)
If you previously defined relationships between tables in the Relationships window in Access or the Database Diagrams in SQL Server, you can choose whether or not to export data from related tables as well. Click the + sign next to any table name to see the name of any related table. Select the check mark that appears next to any table name to include that table's data in your export.
The Transforms button allows you to choose from any custom XML transforms that you may have written or acquired. If you export data that is imported into some esoteric database program, the owner of that database may supply you with a transform file. You can then click the Transforms button and choose that transform file. Likewise, if you need to use a special encoding for that esoteric database, you can choose one from the Encoding drop-down list.
Choosing XML Schema options
The Schema tab, shown in Figure 4, allows you to choose options for exporting a schema file for your object. You can choose to include or ignore primary key and index information. You can also choose whether you want the schema information to be embedded in the XML data document, or stored as a separate file. How you choose options here depends on the program to which the exported data is later imported.
>
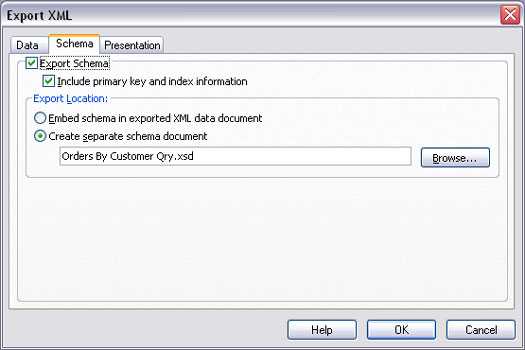
Figure 4: The Schema tab on the expanded Export XML dialog box.
Choosing XML presentation options
The Presentation tab, shown in Figure 5, provides options for defining an XSL file. You can choose to export to Client (HTML), which can be read by any Web browser. If you plan to put the XSL file on a Web server that supports Active Server Pages, you can choose the Server (ASP) option instead.
>
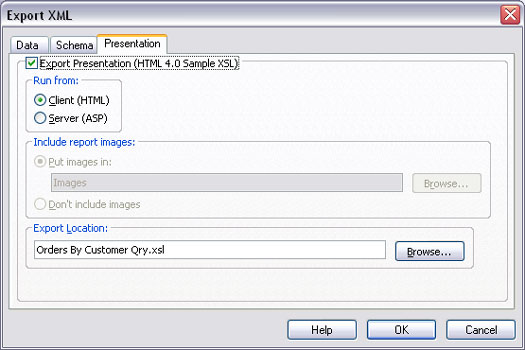
Figure 5: The Presentation tab on the expanded Export XML dialog box.
If the data you export includes pictures, you can choose to export those pictures or just ignore them. If you opt to include images, you can specify the name of the folder in which the images are placed.
Choosing to export a presentation file actually generates two files. One is an .xsl file, which includes all the XSLT code needed to define how the data is presented. The second file is an .htm file — a relatively plain and simple Web page. That Web page is a "snapshot" of the data at the moment of exportation, not live data that's connected to the database. However, the .htm file opens in Internet Explorer to reveal the actual data from the table or query, not just a bunch of XML tags and raw data.
When you finish making your selections, click the OK button. The exportation may only take a few seconds, depending on the amount of data you export. When done, you return to Access. You won't see any changes in your Access database, but the exported files are in whatever folder you specified during the exportation process.
>
dummies
Source:http://www.dummies.com/how-to/content/exporting-access-2003-data-to-xml.html
No comments:
Post a Comment