Windows Vista includes a neat tool — the Snipping Tool — that allows you to capture a screen shot of any object on your screen. Although capturing screen shots, or snipping, isn't a new concept, Windows Vista has made it easier and more functional with the snipping tool. Just follow these steps to see how easy snipping with the Snipping Tool in Windows Vista can be.
>
>
>
1
Choose Start.
>
Go to All Programs→Accessories→Snipping Tool.
>
>
>

>
2
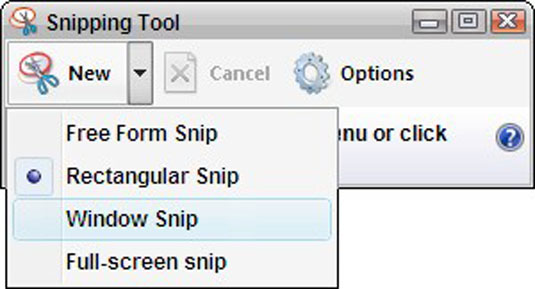
Click the down-arrow on the New button.
>
Choose a snip mode from the drop-down list: Free Form Snip lets you draw any old kind of line you like, such as a triangle, to define what you want to snip; Rectangular Snip does what it says — when you click and drag over a region, it forms a rectangular snip; Window Snip allows you to select an active window to snip; and Full-Screen Snip takes the entire enchilada, capturing the whole screen in the wink of an eye.
>
>
>
>
3
Click and drag.
>
Only if you chose Free Form or Rectangular, you can click and drag on the desktop or in a document to form an area to snip.
>
>
>
>
4
Click on the window you want to snip.
>
Do this only if you chose Windows, but if you chose Full-Screen, the snip happens automatically.
>
>
>
>
5
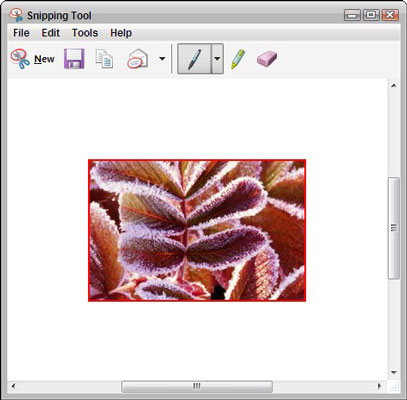
Mark up with image with the Pen, Highlighter, and Eraser.
>
The mark-up window that appears allows you to choose from these tools to mark up the image.
>
>
>
>
6
Click the Save Snip button.
>
The Save Snip button looks like a computer disk and will display the Save As dialog box. The Save As dialog box is where you can enter a filename, specify the location to save the file to, and then click Save.
>
>
dummies
Source:http://www.dummies.com/how-to/content/how-to-capture-screen-shots-using-windows-vistas-s.html
No comments:
Post a Comment