Not all lists are simple one-level lists. Sometimes you want multiple levels with different formats showing different levels of detail. Word 2007 can manage lists with up to nine levels; here’s one with two levels.
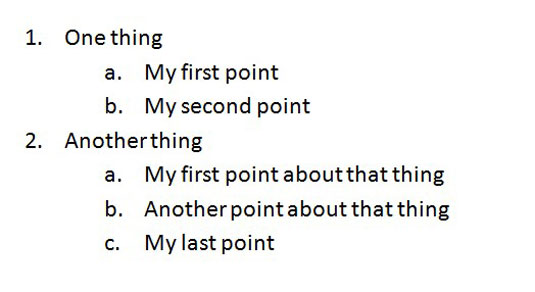
To change the look of a list with many levels, follow these steps.
Locate the Multilevel List button.
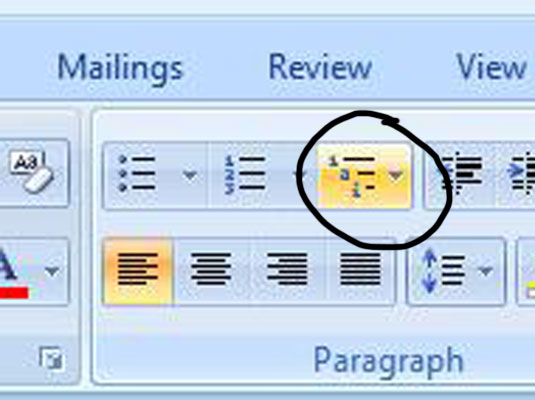
The Multilevel List button is to the right of Bullet and Numbering buttons on the Home tab.
Click the Multilevel List button.
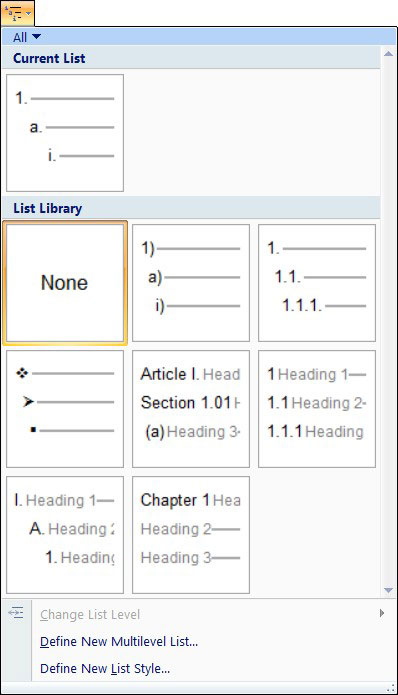
The Multilevel List gallery appears; all paragraphs associated with the current list, at all levels, are selected. You can select one of the entries to change the formatting of the entire list; if you don’t see one you like, the next steps show how to make your own.
Click the Define New Multilevel List link at the bottom of the Multilevel List gallery.
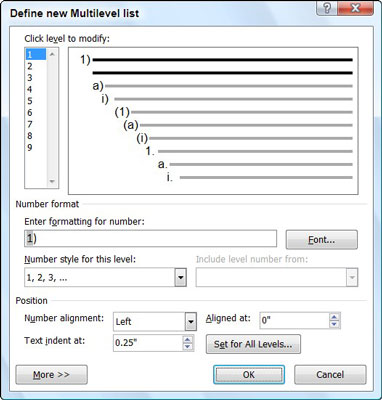
The Define New Multilevel List dialog box appears. Here you can customize each level of the list.
Select the level you want to work with.
It’s easiest to start with the first level and work your way down. You can select other levels by clicking either the number or the preview of that number level in the Click Level to Modify section of the dialog box.
Select a numbering format to use for that level.
You can add text, such as punctuation, to be used with the number by typing in the Enter Formatting for the Number text box.
Adjust the formatting to be used for the level.
Here you can add any text, set the font, and set the indent position for this level of the list.
To indent all levels equally click the Set for All Levels button.
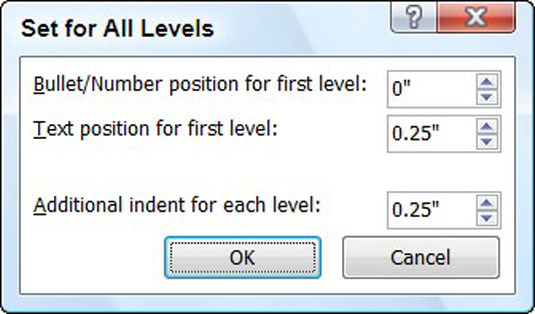
The Set for All Levels dialog box appears. Here you can specify the position of the text for the first line, how far the bullet should be away from the left indent for the first line, and how much to indent each additional level. This command is available only for levels 2 through 9.
Repeat these steps for each level of your list, and click OK when you’re done; you’ve defined a new list style.
No need to define all nine possible levels. Your new list style becomes part of your List Library.
This procedure creates a new multilevel list for this document. To save your list style to your main template, so you can use it with other documents, first select your entire list. Follow the first two steps above, but choose Define New List Style instead. The Define New List Style dialog box appears and should already have all your list formatting.
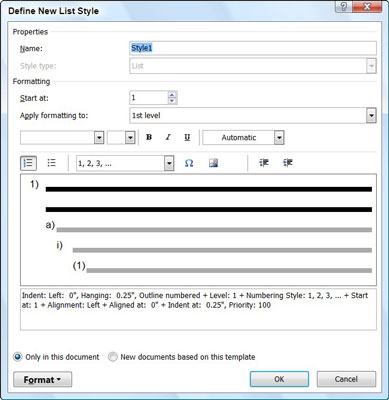
Give your list style a better name than Style1, select the New Documents Based on This Template option at the bottom, and then click OK. Now your multilevel list style is available to any new Word documents you open.
dummies
Source:http://www.dummies.com/how-to/content/how-to-use-multilevel-lists-in-word-2007.html
No comments:
Post a Comment