As you begin your Internet Explorer explorations, if you discover a Web page with really interesting information that you want to have a hard copy of, all you have to do is print the page. Make sure that your printer's turned on and ready to go and then follow these steps:
1. Choose File --> Print.
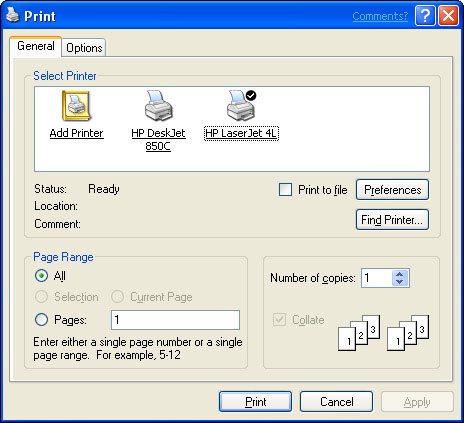
The Print dialog box appears, as shown in Figure 1.
>

>
Figure 1: The Print dialog box.
2. Stare at the Print dialog box for a moment.
If you have more than one printer at your disposal, make sure that the correct printer is selected. If you want to print more than one copy of the page, change the Number of Copies setting.
3. Click OK.
4. Wait a moment while your printer grinds and whirls.
A faster way to print a Web page — assuming that you want only one copy and you know that the correct printer has already been selected as your default printer — is to simply click the Print button (the button that looks like a printer with a piece of paper coming out of the top) on the toolbar.
Opting for print options
The Options tab in the Print dialog box lets you control several aspects of how a Web page is printed. The first set of options are for pages that are laid out in two or more frames, which display content independently of one another. Internet Explorer gives you three options for dealing with frames:
- As laid out onscreen: Prints all the frames together, as they appear on the screen.
- Only the selected frame: Prints only the frame you've selected. This option is available only if you select a frame before calling up the Print dialog box.
- All frames individually: Prints separately all the frames that make up the page.
The Options tab also has two options related to links that appear on the page you're printing:
- Print all linked documents: Prints not only the current Web page, but also any pages that appear as links on the page you're printing.
- Print table of links: Prints a list of all the links that appear on the page.
Laying out your page
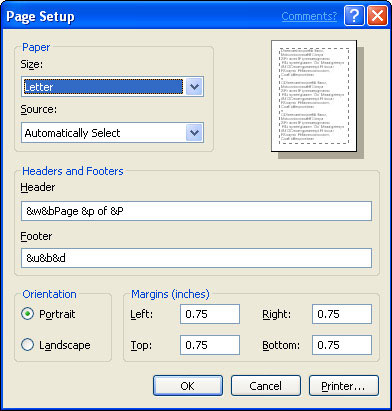
The File --> Page Layout command lets you tweak the appearance of your printed pages by summoning the dialog box shown in Figure 2.
>

>
Figure 2: The Page Setup dialog box.
The following paragraphs describe the page-layout options you can set from this dialog box:
- Paper size: The most common choices are Letter and Legal, but other page sizes are available. The important thing about this setting is to make sure that it corresponds to the type of paper you put in your printer. If you put letter-size paper in your printer but set this option to Legal, your pages don't print properly.
- Paper source: If you have more than one way to feed paper to your printer, this option lets you choose the one you want to use.
- Header and Footer: These fields let you set up information to be printed at the top and bottom of each page. The default settings for these options are to print the page title and page number in the header and the URL and the date in the footer.
- You can customize the information you want to appear in the header and footer, if you dare. Unfortunately, the road to customized headers and footers is paved with nerdy ampersand codes, such as &w, &p, and &b. Take a deep breath and look over the list of codes shown in Table 1. Then, twiddle with the header and footer fields if you can still see straight.
- Portrait or Landscape: This setting specifies the orientation of the printed pages, either Portrait (the long edge of the paper is vertical) or Landscape (the long edge of the paper is horizontal).
- Margins: Lets you set the top, bottom, left, and right margins.
Table 1: Nerdy Codes You Can Use in a Page Header or Footer
Code | Explanation |
&w | The window title, which is usually the title of the Web page. |
&u | The URL (address) of the Web page. |
&d | Short-format date. |
&D | Long-format date. |
&t | Time in regional format. |
&T | Time in 24-hour format. |
&p | Current page number. |
&P | Number of pages in document. |
&& | Prints an ampersand (&). |
&b | The first time this code appears, the text that follows is centered. The second time the code appears, the text that follows is aligned with the right margin. |
Using Print Preview
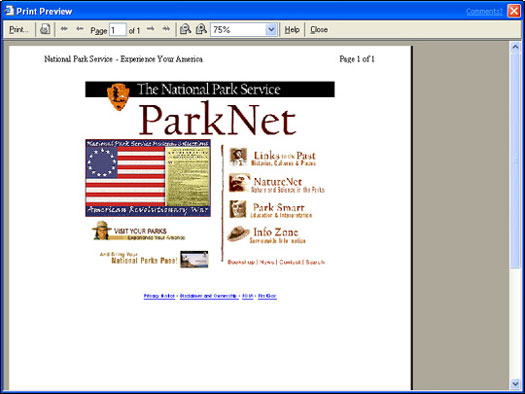
If you want to see how a page will appear on paper before you send it to your printer, choose the File --> Print Preview command. A Print Preview screen appears, as shown in Figure 3.
>

>
Figure 3: Print Preview lets you see how a page will appear before you print it.
>
dummies
Source:http://www.dummies.com/how-to/content/printing-a-web-page-with-internet-explorer-6.html
No comments:
Post a Comment